How to install Tailscale on Proxmox on a CT with a subnet router
Services like Tailscale / Headscale, Twingate and Pomerium are great zero-trust secure VPN options, but it’s not ideal to install them directly on your Proxmox host machine. My goal here is to set up a Tailscale subnet router that provides network access without installing Tailscale on every device.
This approach is especially useful if you want high availability or enhanced security for your host machine and private network, or if you need to access legacy devices (like printers or other machines where you can’t install a VPN). In general, it’s best to minimize modifications to the host machine and let Proxmox do what it does best.
Setup the CT
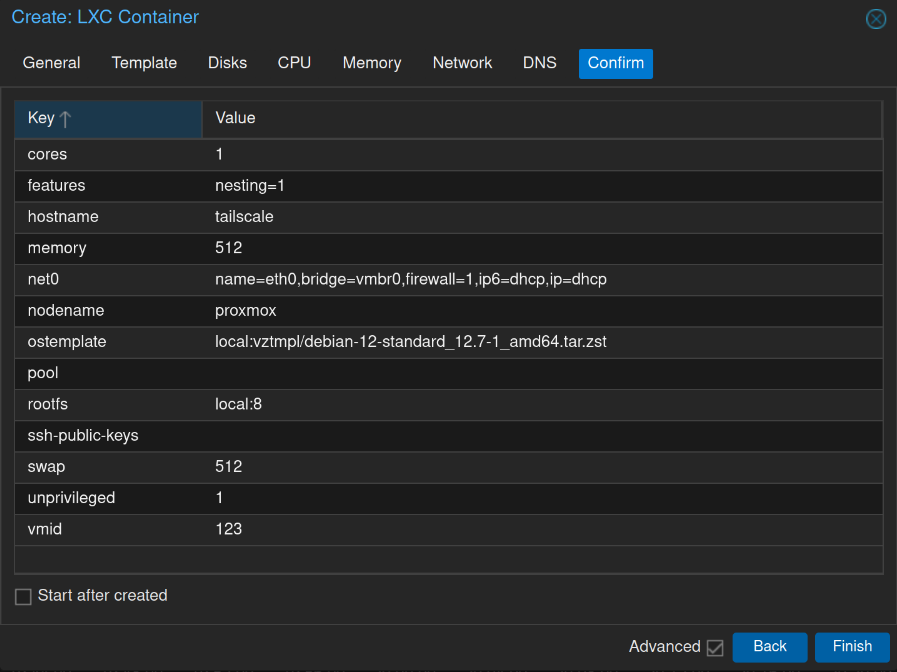
We'll be setting up a Debian 12 LXC, so make sure you have the template (debian-12-standard_12.7-1_amd64.tar.zst) ready first. Create the LXC container (Create CT), making sure to select Unprivileged Container and Nesting if your host supports it. This container doesn’t need much, especially for a homelab setup; I set mine to 1 CPU core and 512 MB of RAM. If you have more users, increase these resources accordingly. You can use DHCP for this machine, but I prefer assigning a static IP whenever possible.
When you’re done, your setup will look similar to this. If everything looks good, go ahead and start the machine. We’ll make a few more changes shortly, so don’t jump ahead and start installing Tailscale just yet.
Prepare Debian
Whenever I start up a few machines like this, it’s generally a good idea to run apt update and apt upgrade first. Once that’s done, install curl and ethtool using apt install curl ethtool. With the basics out of the way, we can get started.
The simplest route is to use the PVE Helper script which will finish preparing your Tailscale container. While this is the easiest method, you should never copy and paste executable code to your host machine without fully understanding what it does. At the time of writing, here’s a summary of what the script does.
The PVE helper script automates adding Tailscale to an existing Proxmox LXC container, this is a breif technical rundown, but if you don't understand something here, stop and research that first.
- Displays a header and prompts the user for confirmation to proceed with adding Tailscale to an LXC container.
- Lists all LXC containers on the Proxmox node and presents them in a menu for the user to select which container to install Tailscale into.
- Once a container is selected, it modifies the container's configuration to allow access to the TUN device (needed for Tailscale networking) by adding required cgroup and mount entries.
- Inside the selected container, it identifies the OS and version, adds the official Tailscale package repository, updates the package list, and installs the Tailscale package quietly.
- Updates the container's tags to include "tailscale" for easy identification in Proxmox.
- Displays success messages and instructs the user to reboot the container and then run
tailscale upinside the container to start Tailscale.
This script streamlines and standardizes the installation process by handling configuration changes, package installation, and tagging automatically.
lxc.cgroup2.devices.allow: c 10:200 rwm
lxc.mount.entry: /dev/net/tun dev/net/tun none bind,create=file
This allows the container to create and use the TUN interface which Tailscale requires to establish VPN connections. After adding these lines, save the file and restart the container. Then you can install and run Tailscale inside the container as usual.
Options -> Console Mode to shell.Now, running tailscale up will start Tailscale, and you can proceed with the usual authentication methods to add the machine to your network. However, we’re not quite done yet because the subnet needs to be set up.
Setuping up the subnet on the Debian 12 Tailscale LXC
Before proceeding, I strongly recommend reading the documentation to understand exactly what a Tailscale subnet is and how it functions: https://tailscale.com/kb/1019/subnetshttps://tailscale.com/kb/1019/subnets
Subnet routers let you extend your Tailscale network (known as a tailnet) to include devices that don't or can't run the Tailscale client. They act as gateways between your tailnet and physical subnets, enabling secure access to legacy devices, entire networks, or services without installing Tailscale everywhere. This capability maintains Tailscale's security model while providing flexibility for complex network environments.
At the time of writing, it will look something like this:
echo 'net.ipv4.ip_forward = 1' | tee -a /etc/sysctl.d/99-tailscale.conf
echo 'net.ipv6.conf.all.forwarding = 1' | tee -a /etc/sysctl.d/99-tailscale.conf
sysctl -p /etc/sysctl.d/99-tailscale.conf
We're also going to use ethtool to make this easier, but follow their examples if you're unsure how this works. Here are the commands. Make sure you run them as root.
NETDEV=$(ip -o route get 8.8.8.8 | cut -f 5 -d " "
ethtool -K $NETDEV rx-udp-gro-forwarding on rx-gro-list off
tailscale up --advertise-routes=192.168.1.0/24
Note that you may want to change the resolver IP and the route to fit your network.
Authorizing the subnet to accept routes
Head back to your Tailscale account and make sure to authorize the subnet by granting access to it. You should already see the advertised route listed. It’s also a good idea to review your ACL policies to restrict access to specific devices if needed.

tailscale set --accept-routesDone!
If you're followed the instructions on the Tailscale documentation, you should now be able to ping devices on the subnet while connected to Tailscale. You’re all set.